


How To Create Django Blog Step By Step Tutorial
Django Blog Tutorial with no script


how I build a simple Django blog from scratch. For the front-end, I use Tailwind to make it look great.
In this tutorial, we’ll build a Blog application with Django
Pre-Requirements
Django is an open-source web framework, written in Python, that follows the model-view-template architectural pattern. So Python is needed to be installed in your machine. Unfortunately, there was a significant update to Python several years ago that created a big split between Python versions namely Python 2 the legacy version and Python 3 the version in active development.
Since Python 3 is the current version in active development and addressed as the future of Python, Django rolled out a significant update, and now all the releases after Django 2.0 are only compatible with Python 3.x. Therefore this tutorial is strictly for Python 3.x. Make sure you have Python 3 installed on your machine if not follow the below guides.
Creating And Activating A Virtual Environment
While building python projects, it's a good practice to work in virtual environments to keep your project, and it's dependency isolated on your machine.
python3 -m venv env
Installing Django In The Virtual Environment
If you have already installed Django, you can skip this section and jump straight to the Setting up the project section. To Install Django on your virtual environment run the below command
pip install Django
Setting Up The Project
In your workspace create a new folder and activate your virtual environment
Now run the following command in your shell to create a Django project.
django-admin startproject myblog
cd myblog
Next, make migrations.
python manage.py migrate
Create Super User
python manage.py createsuperuser
Set username and password for admin dashboard
Create App
python manage.py startapp post
And open settings.py file and add post
INSTALLED_APPS = [
    'django.contrib.admin',
    'django.contrib.auth',
    'django.contrib.contenttypes',
    'django.contrib.sessions',
    'django.contrib.messages',
    'django.contrib.staticfiles',
    'post',
]
Now Create Two Folder inside of post, templates and create second folder inside of templates folder post . and open models.py file and write this code
from statistics import mode
from django.db import models

class Category(models.Model):
    title = models.CharField(max_length=255)

    def __str__(self):
        return self.title

class Post(models.Model):
    category = models.ForeignKey(Category, related_name='posts', on_delete=models.CASCADE)
    title = models.CharField(max_length=255)
    slug = models.SlugField(max_length=255)
    intro = models.TextField()
    body = models.TextField()
    created_at = models.DateTimeField(auto_now_add=True)

    class Meta:
        ordering = ('-created_at', )

    def __str__(self):
        return self.title
Save and update the database using this commands
python manage.py makemigrations
python .\manage.py migrate
after complete migrations open admin.py file and write this code
from django.contrib import admin
from .models import Post, Category

admin.site.register(Category)
admin.site.register(Post)
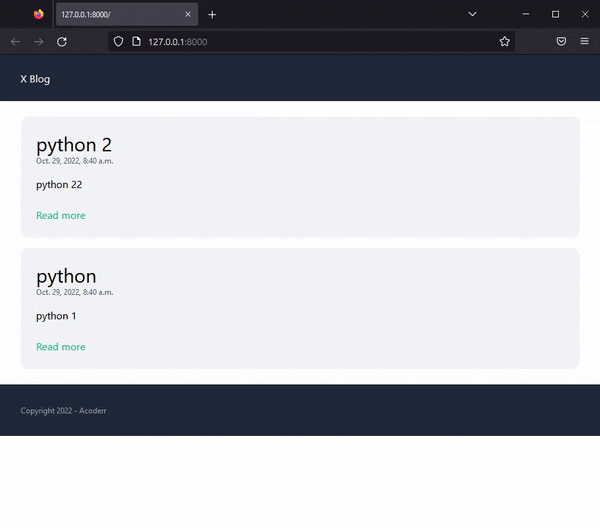
let's run the server python manage.py runserver and open /admin login and create a new category and post for testing, after creating post let's open templates/post and create base.html file and write this code
<!doctype html>

<html>
    <head>
        <meta charset="UTF-8">
        <meta name="viewport" content="width=device-width, initial-scale=1.0">
        <script src="https://cdn.tailwindcss.com"></script>
    </head>

    <body>
        <nav class="py-6 px-8 bg-gray-800 text-white">
            <a href="/">X Blog</a>
        </nav>

        <main class="py-6 px-8">
            {% block content %}
            {% endblock %}
        </main>

        <footer class="py-8 px-8 bg-gray-800 text-gray-400">
            <p class="text-xs">Copyright 2022 - Acoderr</p>
        </footer>
    </body>
</html>
after write the code create one more file frontpage.html and open past this code
{% extends 'post/base.html' %}

{% block content %}
<div class="space-y-4">
    {% for post in posts %}
    <article class="p-6 bg-gray-100 rounded-xl">
        <h2 class="text-3xl">{{ post.title }}</h2>

        <span class="mb-4 block text-xs text-gray-600">{{ post.created_at }}</span>

        <p class="mb-6">{{ post.intro }}</p>

        <a href="{% url 'post_detail' post.slug %}" class="text-emerald-500">Read more</a>
    </article>
    {% endfor %}
</div>
{% endblock %}
and open views.py file and past this code
from django.shortcuts import render, get_object_or_404, redirect
from .models import Post

def frontpage(request):
    posts = Post.objects.all()

    return render(request, 'post/frontpage.html', {'posts': posts})

def post_detail(request, slug):
    post = get_object_or_404(Post, slug=slug)

    return render(request, 'post/detail.html', {'post': post})
open urls.py add this path
from django.contrib import admin
from django.urls import path

from post import views

urlpatterns = [
    path('admin/', admin.site.urls),
    path('', views.frontpage, name='frontpage'),
    path('<slug:slug>/', views.post_detail, name='post_detail'),
]
let's create detail.html file inside of templates/post folder and past this code
{% extends 'post/base.html' %}

{% block content %}
<article class="p-6 bg-gray-100 rounded-xl">
        <h2 class="text-3xl">{{ post.title }}</h2>

        <span class="mb-4 block text-xs text-gray-600">{{ post.category.title }} | {{ post.created_at }}</span>

        <p class="mb-6 font-semibold">{{ post.intro }}</p>

        <p class="text-gray-800">
            {{ post.body }}
        </p>

    </article>

  <div class="mt-4 p-6 bg-gray-100 rounded-xl">
        <h3 class="mb-4 text-xl">Comments</h3>

        {% for comment in post.comments.all %}
            <div class="mb-4 w-full py-4 px-6 rounded-xl bg-white">
                <strong>{{ comment.name }}</strong> | {{ comment.created_at|timesince }} ago<br>

                <p class="text-gray-500">{{ comment.comment }}</p>
            </div>
        {% endfor %}

        <h3 class="mb-4 text-xl">Add new comment</h3>

        <form method="post" action="." class="space-y-4">
            {% csrf_token %}

            <div>
                <label>Name</label><br>
                <input type="text" name="name" class="w-full py-4 px-6 rounded-xl bg-white">
            </div>

            <div>
                <label>E-mail</label><br>
                <input type="email" name="email" class="w-full py-4 px-6 rounded-xl bg-white">
            </div>

            <div>
                <label>Comment</label><br>
                <textarea name="comment" class="w-full py-4 px-6 rounded-xl bg-white"></textarea>
            </div>

            <div>
                <button class="py-4 px-6 rounded-xl bg-emerald-800 text-white">Submit</button>
            </div>
        </form>
    </div>

{% endblock %}
open models.py file add this
class Comment(models.Model):
    post = models.ForeignKey(Post, related_name='comments', on_delete=models.CASCADE)
    name = models.CharField(max_length=255)
    email = models.EmailField(max_length=255)
    comment = models.TextField()
    created_at = models.DateTimeField(auto_now_add=True)
save this and open views.py and remove all code and add this code
from django.shortcuts import render, get_object_or_404, redirect
from .models import Post, Comment

def frontpage(request):
    posts = Post.objects.all()

    return render(request, 'post/frontpage.html', {'posts': posts})

def post_detail(request, slug):
    post = get_object_or_404(Post, slug=slug)

    if request.method == 'POST':
        name = request.POST.get('name', '')
        comment = request.POST.get('comment', '')

        if name and comment:
            Comment.objects.create(
                post=post,
                name=name,
                comment=comment
            )

            return redirect('post_detail', slug=post.slug)

    return render(request, 'post/detail.html', {'post': post})
Save and update the database using this commands
python manage.py makemigrations
python .\manage.py migrate
and run the server to check its work fine or not
Add Category
so open detail.html file and replace this code to this
<span class="mb-4 block text-xs text-gray-600"> <a href="{% url 'category_detail' post.category.id %}">{{ post.category.title }}</a> | {{ post.created_at }}</span>
open views.py and add this code
from .models import Post, Comment, Category

def category_detail(request, pk):
    category = get_object_or_404(Category, pk=pk)

    return render(request, 'post/category.html', {'category': category})
and open urls.py and add this path
path('categories/<int:pk>/', views.category_detail, name='category_detail'),
let's create category.html file inside of templates/post folder and past this code
{% extends 'post/base.html' %}

{% block content %}
<div class="space-y-4">
    <h1 class="text-3xl">{{ category.title }}</h1>

    {% for post in category.posts.all %}
        <article class="p-6 bg-gray-100 rounded-xl">
            <h2 class="text-3xl">{{ post.title }}</h2>

            <span class="mb-4 block text-xs text-gray-600">{{ post.created_at }}</span>

            <p class="mb-6">{{ post.intro }}</p>

            <a href="{% url 'post_detail' post.slug %}" class="text-emerald-500">Read more</a>
        </article>
    {% endfor %}
</div>
{% endblock %}
Save and update the database using this commands
python manage.py makemigrations
python .\manage.py migrate
and run the server
Demo
Now visit the homepage and click on read more, it should redirect you to the post detail page.
Wrapping It Up
We have come to the end of this tutorial. Thank you for reading this far. This post is just the tip of the iceberg considering the number of things you could do with Django.
We have built a basic blog application from scratch! Using the Django
If you are stuck at any step, refer to this GitHub repo
This blogging app should be enough to get you started with Django.