

How to connect the React JS frontend with the Django backend

I am beginner to the world of web development and i hope to learn much more and I intend to do my part by sharing interesting topics.
This tutorial will guide you through the easy steps. We are going to set up the Django backend first then we'll set up our react frontend and finally connect them.
Setting up the Project
First, you need to create the main project folder 📂 go inside the folder and create 2 folders frontend and backend after creating open vs code or another ide
Setting up the Django backend.
I think you already have Python installed on your machine. If you don't, you can download and set it up via this link.
Open the Command Line on Windows, Terminal on Mac, and Linux and navigate to the directory where you want to store the project.
Installing Django and other packages
Now let us proceed to install Django, Django rest framework and Django Cors headers
pip install django
pip install djangorestframework
pip install django-cors-headers
Now open the backend folder Create a new Django project and name it “backend”
django-admin startproject backend
Move into the project directory
cd backend
Now create app
python manage.py startapp api
After creating There are a few changes in the settings.py file which are listed below
First changes in INSTALLED APPS add the last 3 lines
INSTALLED_APPS = [
    'django.contrib.admin',
    'django.contrib.auth',
    'django.contrib.contenttypes',
    'django.contrib.sessions',
    'django.contrib.messages',
    'django.contrib.staticfiles',
    'rest_framework',
    'api',
    'corsheaders',
]
And second change in MIDDLEWARE
MIDDLEWARE = [
    'django.middleware.security.SecurityMiddleware',
    'django.contrib.sessions.middleware.SessionMiddleware',
    'django.middleware.common.CommonMiddleware',
    'django.middleware.csrf.CsrfViewMiddleware',
    'django.contrib.auth.middleware.AuthenticationMiddleware',
    'django.contrib.messages.middleware.MessageMiddleware',
    'django.middleware.clickjacking.XFrameOptionsMiddleware',
    'corsheaders.middleware.CorsMiddleware',
]
Now create a model so open the models.py file inside the API folder and create the student class
from django.db import models

# Create your models here.
class Student(models.Model):
    stuname = models.CharField(max_length=100)
    email = models.CharField(max_length=100)
Open the admin.py file this file is available in the API folder and mentions student class,
from django.contrib import admin
from .models import Student
# Register your models here.

@admin.reg
ister(Student)
class StudentAdmin(admin.ModelAdmin):
    list_display = ['id', 'stuname', 'email']
Now let’s open the terminal and Run the following commands on the terminal.
- This command is used to detect changes made in the database.
python manage.py makemigrations
- This command applies those changes to the database.
python manage.py migrate
Now we create admin using this command
python manage.py createsuperuser
- This command will run the server and the server should always be running.
python manage.py runserver
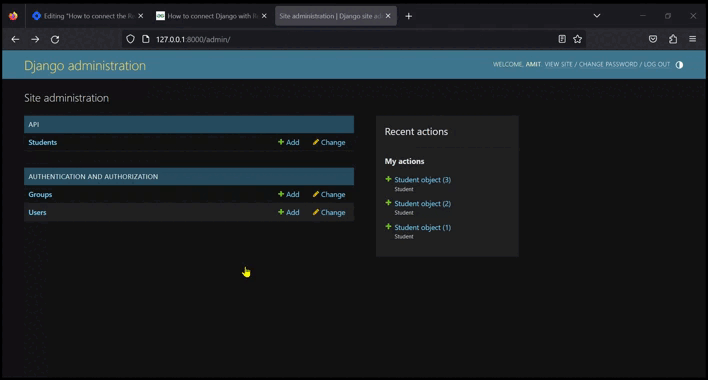
Open the web browser of your choice (Chrome recommended) search for localhost:8000/admin/login using your username and password
and click on students and some data
okay now we create a serializers.py file inside the API folder 📂 and open and import the rest framework, import models create the Student Serializer class and create a metaclass inside the student serializer class
from rest_framework import serializers
from .models import Student

class StudentSerializer(serializers.ModelSerializer):
    class Meta:
        model = Student
        fields = ['id', 'stuname', 'email']
and create views, open views.py file and write this code
from django.shortcuts import render
from .serializers import StudentSerializer
from rest_framework.generics import ListAPIView
from .models import Student

# Create your views here.
class StudentList(ListAPIView):
    queryset = Student.objects.all()
    serializer_class = StudentSerializer
now create a new urls.py file inside the API folder and write this code
from django.urls import path
from api import views

urlpatterns = [
    path('student/', views.StudentList.as_view()),
]
and connect this file to the main urls.py file inside the backend folder
from django.contrib import admin
from django.urls import path, include

urlpatterns = [
    path('admin/', admin.site.urls),
    path('api/', include('api.urls'))
]
open the settings.py file and disable DRF, write this code in the last of the file
REST_FRAMEWORK = {
    'DEFAULT_RENDERER_CLASSES':('rest_framework.renderers.JSONRenderer',)
}
now run the server in the background
Setting up the react frontend.
Next, we need to create the frontend react application inside the frontend folder
npx create-react-app frontend
Move into the frontend directory and then start the frontend application by running
npm start
You should see the default react application page in your browser now. ok install some important library
npm i axios
now open this app.js file and write this code
import React, {useEffect, useState} from 'react'
import axios from "axios"

function App() {
  const [student, setStudent] = useState([])

  useEffect(()=>{
    async function getAllStuednt(){
      try {
        const students = await axios.get("http://127.0.0.1:8000/api/student/")
        // console.log(students.data)
        setStudent(students.data)
      } catch (error) {
        console.log(error)
      }
    }
    getAllStuednt()
  }, [])
  return (
    <>
    <h1>React + Django</h1>
    {
      student.map((student, i)=>{
        return(
          <>
          <h3>{student.stuname}</h3>
          <h6>{student.email}</h6>
          </>
        )
      })
    }
    </>
  )
}

export default App
and the last step copy your react server link open the settings.py file inside the backend folder and add this code in the last
CORS_ALLOWED_ORIGINS = [
    'http://localhost:5173',
    # Add other origins as needed
]
and restart the Django server and react also
Congratulations! You've successfully learned how to connect a React JS frontend with a Django backend, and you're now equipped to embark on your web development journey with confidence. By integrating these two powerful technologies, you have the tools to turn your project ideas into reality. Whether you choose the method that aligns with your project's specific requirements or decide to combine aspects from both approaches, the possibilities are endless.
As you embark on this exciting path of web development, remember that React and Django are just the beginning. Continue to explore, experiment, and enhance your skills to create web applications that not only meet but exceed your expectations. Cheers to your upcoming projects, and may they be a resounding success in the world of web development!


